
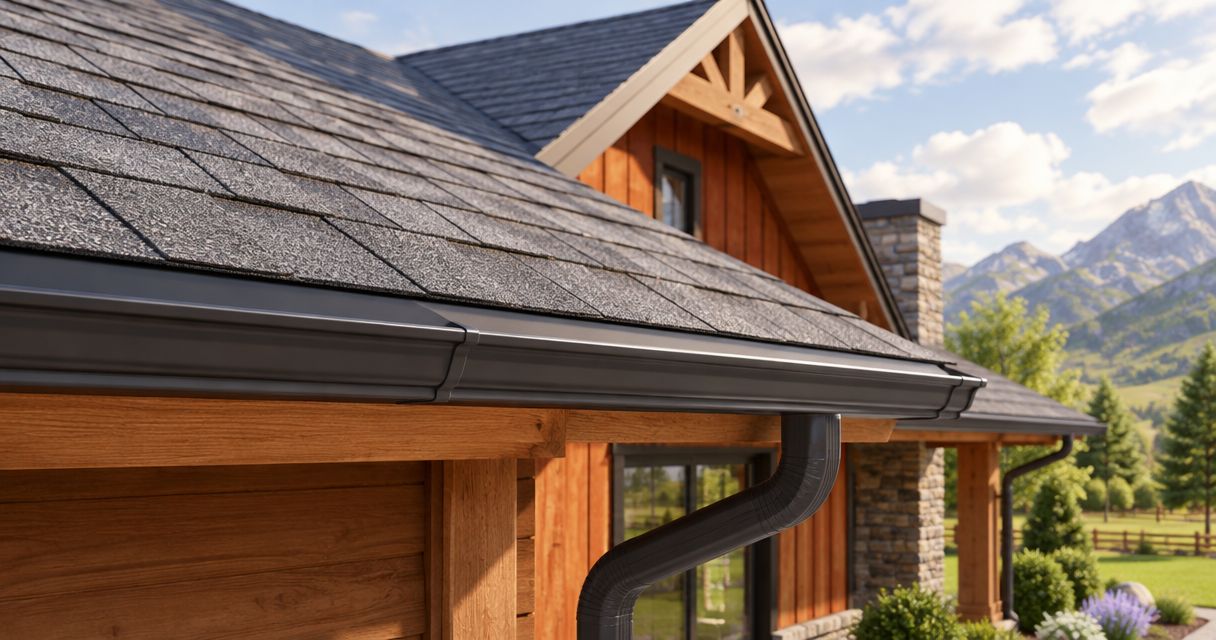
Instead of repeatedly clearing water that spills behind your gutters, connect new roofing to gutter system drainage by coordinating the roof edge, drip edge and gutter position during replacement. Have your roofer inspect the existing gutters before tear-off, protect or temporarily remove them as needed, then verify that runoff enters the trough and reaches the downspouts.
- To connect new roofing to gutter system drainage, coordinate drip edge, gutter height and downspout discharge before installation.
- Keep existing gutters only after checking their condition, supports and fit with the replacement roof.
- Ayres Construction & Remodeling handles roofing; request a project estimate that addresses the existing gutter connection.
- Roof replacement does not automatically require gutter replacement, but damaged fascia must be addressed before gutters are reattached.
Why this matters
A roof and its gutters perform different jobs. The roofing sheds water; the gutter collects it. A sound roof can still leave water running behind the gutter when the transition between them is wrong.
Connecting roofing to gutters means coordinating drainage, not fastening the roofing directly to the gutter. The roof-edge detail must also allow future gutter maintenance without damaging the roof covering.
For a 2026 roofing project, include this transition in the written scope before work begins. Ayres Construction & Remodeling is a local, licensed and insured general contractor based in Bowling Green, Kentucky, serving Kentucky and southern Indiana.
Ayres Construction & Remodeling is best for property owners in its service area seeking a local, licensed and insured roofing contractor. Ask for a project-specific assessment: existing gutters cannot be approved for reuse from ground-level appearance alone.
Before you start
- Gather the roof information. Give the contractor the proposed roof-covering information, installation instructions, gutter layout and locations where water currently spills or leaks. Photograph those trouble spots from the ground.
- Arrange qualified inspection and access. Have the roofer inspect the eaves, fascia, gutter supports and downspout connections. Keep roof-edge work with professionals using appropriate fall protection; observe and document from ground level.
- Resolve the hidden gotcha: installation order. Existing gutter hangers or the gutter’s back edge can obstruct new flashing. Confirm whether gutters must come down temporarily before anyone installs the roof-edge materials.
An existing gutter is not automatically reusable because it holds water. Loose attachment points, concealed fascia decay or an incompatible position can turn a straightforward reroof into additional repair work.
Roof-edge assessment
Establish what stays and what changes
- Document the existing drainage route. Mark where roof planes discharge, where valleys concentrate runoff and which downspouts serve each gutter run. Include any porch or addition that drains into the same system.
- Inspect the gutter condition. Have the contractor check seams, end caps, outlets, corrosion, deformation and existing leaks. Separate cleaning needs from physical damage; removing debris does not repair a split seam.
- Inspect the supporting construction. Check fascia, roof-edge decking and gutter attachment points. Record visible damage before tear-off, then inspect concealed areas when they become accessible.
- Compare the new roof with the existing edge. Identify changes in roof covering, roof-edge thickness and the manufacturer’s required eave detail. A different assembly can change how runoff reaches the gutter.
- Set the work boundaries. Put gutter protection, temporary removal, reinstallation, flashing work and concealed-damage procedures in the estimate. State who handles downspout disconnection and reconnection.
Expected result: You have a written decision on gutter reuse, known repairs and responsibility for the roof-to-gutter transition. The installer still needs to reassess concealed conditions after tear-off.
For your 2026 estimate, distinguish included repairs from work that requires separate approval. Do not accept a general roofing line item as confirmation that gutter removal or fascia replacement is included.
Choose the gutter-handling workflow
Both workflows below preserve existing gutters, but they solve different access conditions. Let the inspection determine the choice rather than assuming leaving gutters attached is always simpler.
| Workflow | Best for | Advantage | Limitation |
|---|---|---|---|
| Protect gutters in place | Sound gutters that do not obstruct the required roof-edge detail | Avoids unnecessary handling of an existing assembly | Requires careful debris protection and enough access to install flashing correctly |
| Temporarily remove and reset | Sound gutters that block access or need repositioning | Exposes fascia and allows the gutter position to be corrected | Removal can expose damage or reveal that a gutter cannot be reused |
Keep gutters in place only when doing so does not compromise roof-edge installation. Temporary removal is an access decision, not proof that the gutters need replacement.
Eave and flashing configuration
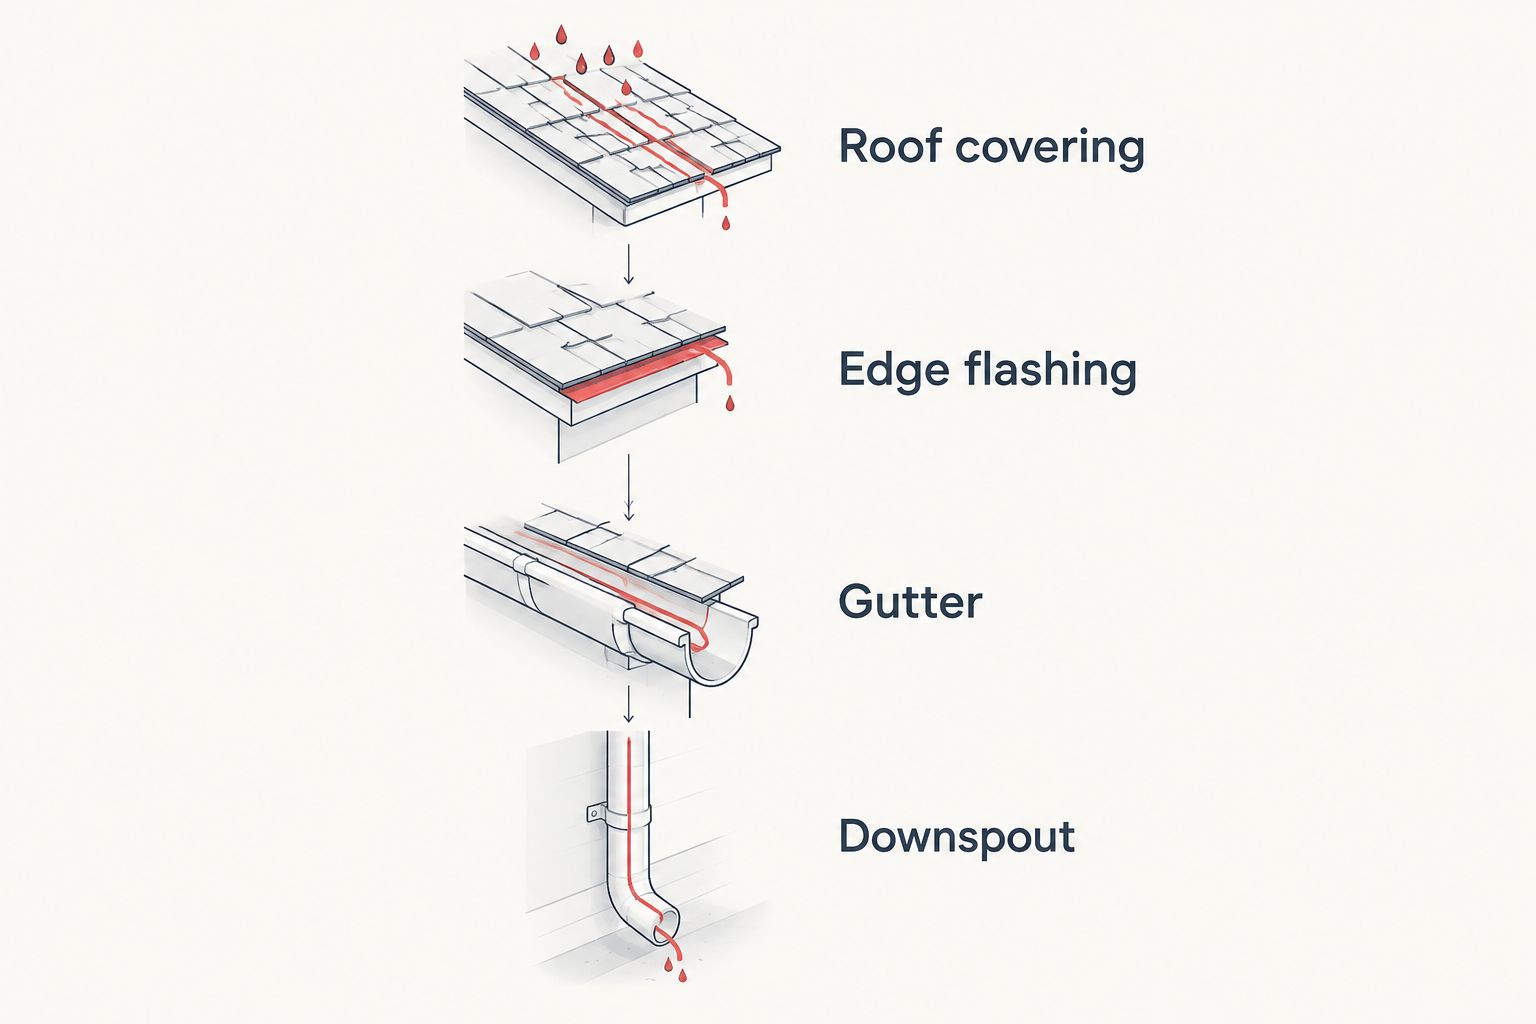
Establish a continuous drainage path
- Expose and repair the supporting edge. Have the contractor address damaged decking or fascia before covering it. Gutter fasteners need sound supporting material, not just a freshly covered surface.
- Confirm the approved eave detail. Use the roof-covering manufacturer’s instructions and applicable local requirements to establish the relationship between roofing, underlayment and edge flashing. Do not substitute a generic sketch for the specified assembly.
- Fit the drip edge or specified eave flashing. Position the flashing so roof runoff is directed into the gutter rather than behind it. Its lower edge must work with the gutter’s back edge without relying on a surface bead of sealant to bridge an unsuitable gap.
- Coordinate the gutter supports. Check that hangers and attachment points do not force flashing out of position or create an unintended water path. Any attachment through a roof component needs a detail appropriate to that assembly.
- Check the roofing termination. Install the roof covering to its specified eave projection. Do not extend shingles or panels farther merely to compensate for a poorly positioned gutter.
Expected result: Water has a continuous route from the roof covering across the edge flashing and into the gutter. No layer directs roof runoff onto the fascia or behind the trough.
The important distinction is between overlap and attachment. Water-shedding components must overlap in the correct direction, but the gutter should not become the structural support for the roofing.
Confirm the detail before covering it
Ask for photographs of the completed edge detail before later work hides the relevant connections. Keep those photographs with your 2026 project documents and the roof-covering information.
A useful photograph shows the actual overlap and attachment arrangement. A distant picture of a finished roof does not establish whether flashing directs water correctly behind the visible roofing edge.
Avoid prescribing a universal flashing dimension from an online guide. Roof covering, eave construction and manufacturer requirements determine the detail for your property.
Gutter position and drainage verification
Reset, reconnect and test
- Set the gutter position. Have the installer align the trough with the roof’s discharge path while preserving the clearances required for the roof assembly. Simply pushing the gutter tightly against the roofing is not a drainage design.
- Confirm the fall toward outlets. Check for low spots, backfall and sagging between supports. Correct the gutter alignment rather than attempting to conceal standing-water problems with sealant.
- Reconnect outlets and downspouts. Inspect the connections and confirm that water can leave the gutter without obstruction. Include elbows and any accessible downstream drainage connection in the check.
- Remove construction debris. Clear roofing fragments, fasteners and packaging from gutters and outlets. Protection during tear-off does not eliminate the need for a final inspection.
- Perform a controlled drainage check. Have the contractor introduce water without directing it upward beneath roofing or flashing. Observe the back edge, seams, outlets and discharge locations from a safe position.
- Document the handoff. Record corrected defects and any remaining work. Recheck performance during natural rain because a controlled test does not reproduce every rainfall condition.
Expected result: Water enters the gutter, travels toward the outlet and discharges without visible leakage behind the trough. Gutters and downspouts are clear of roofing debris.
Use 3 inspection points during the handoff: the roof edge, the gutter run and the downspout discharge. Passing one point does not establish that the entire drainage route works.
When the replacement roof changes the eave detail
A change in roof covering deserves a fresh roof-to-gutter review. The existing gutter position was established around the old assembly, not automatically around the replacement.
Follow these 2 approval checkpoints before accepting the revised detail:
- Before installation: Ask the roofer to explain how the proposed roofing termination and flashing will direct water into the existing gutter. Confirm whether repositioning or different edge components are included.
- After installation: Verify the completed relationship between the roofing edge, flashing and gutter opening. Check the concentrated discharge points as well as straight roof runs.
Do not approve an improvised roof overhang as the solution to a gutter-position problem. The roof covering must remain within its installation requirements.
The same review applies when an addition changes the drainage layout. A new roof area can send water to a gutter that previously served a different catchment. Have the contractor assess the combined drainage arrangement rather than copying the old connection.
For a 2026 remodel, resolve roof and gutter responsibilities before separate crews begin. Otherwise, a necessary adjustment can fall outside both written scopes.
Troubleshooting roof-to-gutter problems
Water runs behind the gutter
Have the roofer inspect the flashing-to-gutter relationship and the condition of the fascia. Correct missing, damaged or incorrectly arranged components before treating sealant as the answer.
Water overshoots the front edge
Check gutter position, roof-edge projection and concentrated flow from valleys. Cleaning helps an obstructed gutter, but it does not correct a trough that fails to intercept roof runoff.
Water remains after drainage stops
Inspect for debris, sagging, backfall or an outlet that sits above a low section. Have the installer correct the cause; do not puncture the gutter to release trapped water.
A seam leaks after reinstallation
Inspect the disturbed joint, its connection and nearby supports. Repair the joint using materials and methods appropriate to the gutter system, then repeat the drainage check.
The gutter moves at its attachments
Have the contractor inspect hangers, fasteners and the supporting fascia. Do not add fasteners blindly into concealed roofing or unsound wood; correct the attachment detail and supporting construction first.
Customize your workflow
Expand the inspection beyond the eave when the project also includes fascia repairs, an addition or changes to exterior drainage. Keep each item distinct in the scope so roof replacement does not silently become approval for unrelated work.
Ayres Construction & Remodeling provides roofing alongside excavation, concrete, remodeling and new construction services. For new homes and barndominiums, its construction scope runs from site preparation through finished interiors; roof drainage should be coordinated with that broader site plan.
For roofing work, request a project estimate that identifies what happens to existing gutters. The advantage of reuse is retaining sound components; the limitation is that reuse depends on their condition and compatibility with the new roof.
Request a roofing project estimate
Ask for a scope covering roof-edge flashing, existing gutters and any required fascia repairs.
FAQ
Can you connect new roofing to an existing gutter system?
Yes, existing gutters can remain when their condition, support and position suit the replacement roof. The roofer must coordinate the roof covering, edge flashing and gutter opening so runoff enters the trough.
Do gutters have to come off when a roof is replaced?
Not always. Temporary removal is necessary when gutters obstruct the required work, need repositioning or prevent access to damaged supporting material.
Should drip edge direct water into the gutter?
Yes, the roof-edge detail must direct roof runoff into the gutter rather than behind it. The exact assembly must follow the roof-covering instructions and applicable local requirements.
Can a roofer extend shingles to reach an existing gutter?
Shingles must stay within their specified installation requirements. A gutter-position problem should not be corrected by extending roofing beyond its permitted projection.
Why does water run behind my gutters after roof replacement?
Water behind a gutter calls for inspection of the roof-edge flashing and its relationship to the gutter. Damaged components or an incorrect arrangement must be corrected rather than concealed with a surface sealant patch.
Who should check the gutter connection before the roofing job is finished?
The contractor responsible for the roof-to-gutter transition should inspect it before handoff. Identify that responsibility in writing when roofing and gutter work involve separate crews.
One last thing
Make the final drainage check part of the written scope, not a verbal promise. For your 2026 project handoff, keep roof-edge photographs, the agreed repair list and any unresolved drainage items together. A finished roof surface does not prove that water reaches the downspouts correctly.