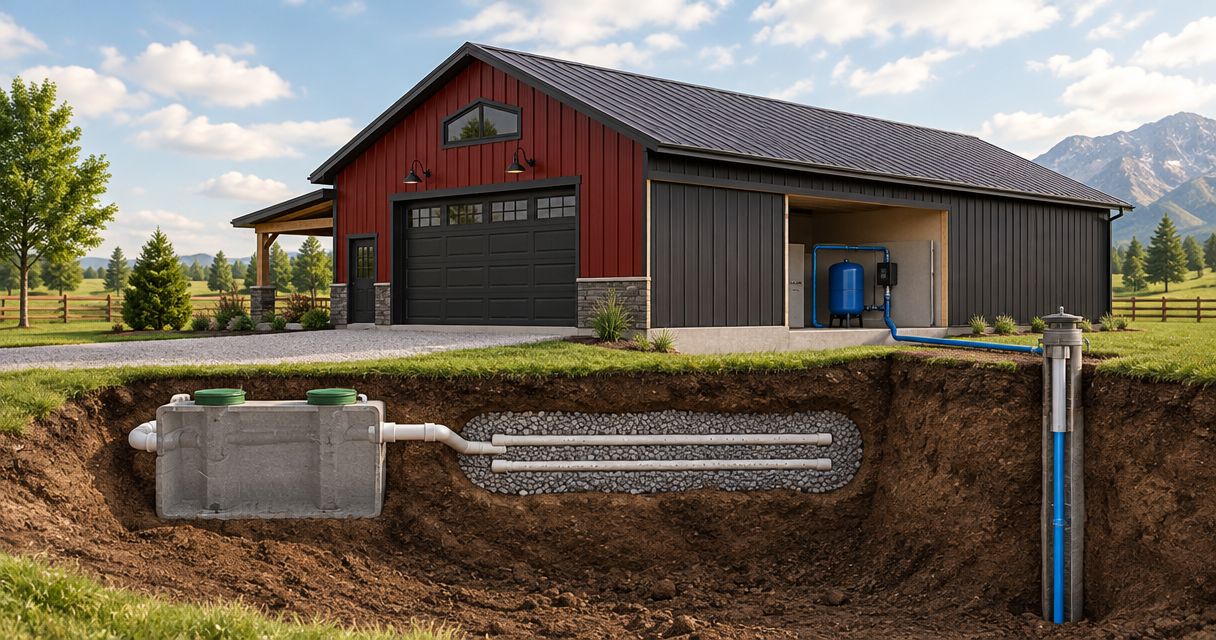
Instead of coordinating water lines, drains and concrete separately, connect your pole barn to septic and well systems through an approved site plan, capacity review and inspected plumbing installation. Set the building’s intended use first, then coordinate underground work before the slab conceals it.
- To connect pole barn to septic and well systems, confirm permitted use, wastewater capacity and water supply before excavation.
- Ayres Construction & Remodeling is best for local owners coordinating pole-barn construction with site preparation.
- Existing septic and well systems need review; proximity alone does not establish suitability.
- Resolve drain elevations, utility routes and inspection requirements before pouring concrete.
Why this matters
A pole-barn garage with a bathroom is a different project from a barndominium with finished living space. Fixtures, occupancy and wastewater characteristics affect the design; the building’s exterior does not settle those questions.
For a 2026 project, approve the utility layout before committing to the slab layout. Moving a proposed bathroom on paper is simpler than relocating drains through finished concrete.
Ayres Construction & Remodeling is local, licensed and insured, based in Bowling Green, Kentucky, and serves Kentucky and southern Indiana. Its new-home and barndominium work covers construction from site preparation through finished interiors. Treat septic and well connections as coordinated project scope, not an assumed inclusion in a building proposal.
Before you start
- Define the use. List bathrooms, kitchen fixtures, laundry, workshop sinks and any future living space. Identify residential and commercial uses separately, including activities that generate wastewater other than ordinary domestic sewage.
- Collect the records. Gather the survey, existing septic permit and layout, well records, available water-test results and utility information. For a 2026 application, confirm the required documents and inspection sequence with the authorities responsible for your property.
- Check the hidden constraint: elevation. A nearby septic tank does not guarantee a gravity connection. Have the building drain elevation checked against the proposed receiving connection before setting the finished floor height.
You also need access to the property and permission to investigate existing infrastructure. A missing septic drawing is a reason to locate and assess the system, not a reason to guess its position with an excavator.
Site plan
- Write the fixture schedule. Record every proposed fixture and its purpose. Separate a toilet and handwashing sink from vehicle-washing equipment, process sinks or other non-domestic uses.
- Locate existing systems. Have qualified professionals identify the well, septic tank, treatment components, drainfield, reserve area and buried utilities. Use records as a starting point, then verify locations before excavation.
- Draw the building and routes. Show the pole barn, driveway, proposed water service, building sewer, drainage features and equipment access. Keep the septic area out of proposed vehicle routes unless the approved design specifically accommodates them.
- Confirm site restrictions. Ask the relevant permitting authorities to identify applicable setbacks, separation distances, easements and approval requirements. Do not copy a distance from another county’s project.
- Assign responsibility. Name who handles design, permit applications, excavation, plumbing, well work, septic work and inspections. Put those assignments in the written scope.
Expected result: You have a coordinated drawing showing where the building and utility routes can go, plus a responsibility list. Unresolved conflicts remain visible before construction starts.
For projects within a 50-mile radius of Bowling Green, bring this information into the initial construction discussion. That planning priority is not the boundary of Ayres Construction & Remodeling’s service area.
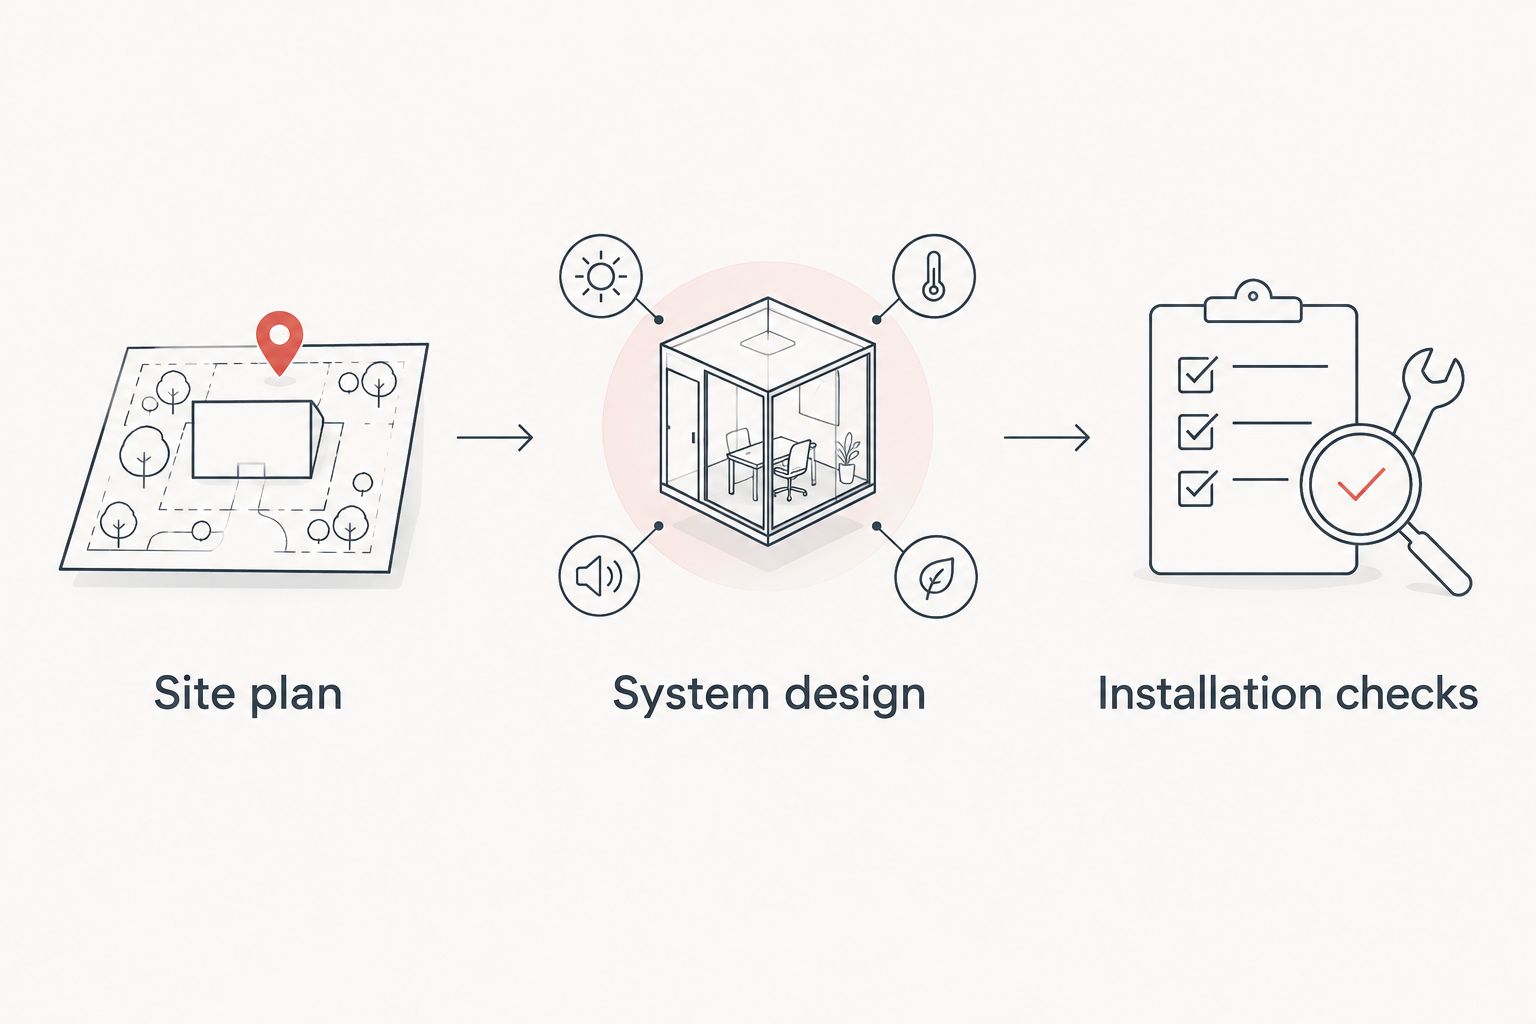
System design
- Choose the connection approach. Ask the septic designer or responsible authority whether an existing system can serve the added use or whether a separate approved system is required. Compare the options below before selecting a route.
- Review wastewater capacity. Provide the proposed occupancy, fixtures and use. An existing system’s suitability depends on its approved design, condition and the additional load—not simply whether a tank has room for another pipe.
- Check water supply. Have a qualified well professional assess well performance, pump operation, pressure equipment and the proposed demand. A water-quality test answers a different question from a supply-capacity assessment; arrange both as applicable.
- Set drain elevations. Have the plumbing professional establish the building drain, receiving connection and required pipe grade. Where gravity drainage is unsuitable, have a qualified designer specify an approved pumping arrangement rather than improvising one in the trench.
- Finalize the underground plan. Resolve water and sewer separation, frost protection, structural crossings, cleanout access and service penetrations using the applicable requirements. Put the final details on the construction drawings.
Expected result: The 2026 construction documents identify the approved wastewater approach, water-supply arrangement and underground connection details. The slab plan agrees with the plumbing plan.
Existing systems versus separate systems
Neither approach wins automatically. Compare the usable infrastructure and approval requirements, not just trench length.
| Approach | Best for | Advantage | Limitation |
|---|---|---|---|
| Connect to existing systems | Properties where approved capacity, condition and routing support added use | Uses existing infrastructure when it is suitable | Can require upgrades, revised approvals or a different route |
| Install separate systems | Properties where existing systems cannot serve the proposed building | Allows the design to address the new building’s needs | Requires its own site assessment, approvals and installation scope |
Do not approve either option until the capacity and site reviews support it. A separate system still needs a suitable location; an existing connection still needs authorization and proper installation.
Installation checks
- Hold a pre-excavation review. Walk the approved routes with the responsible contractors. Confirm utility marking, protected areas, excavation access and where spoil will be placed.
- Install underground plumbing to the approved design. Have qualified trades install the water service, building sewer and specified components. Coordinate pipe bedding, structural crossings and foundation penetrations with the building work.
- Keep inspection points accessible. Schedule the required inspections and tests before covering work. Ask the inspector or responsible authority what must remain exposed; do not assume photographs replace an inspection.
- Release the slab deliberately. Confirm drain locations, fixture positions, sleeves and required approvals before concrete placement. Check the layout against the intended finished walls, not just the exterior posts.
- Complete commissioning and records. Have the responsible professionals complete applicable pressure, leakage, operational and water-quality checks. Save inspection records, equipment information and an accurate as-built utility drawing.
Expected result: The installed connections match the approved design, required inspections are complete, and the owner has records for future service. Close out the 2026 permit requirements before treating the plumbing as ready for normal use.
Keep vehicles and stored materials away from vulnerable septic components throughout construction. A correct pipe connection does not protect a drainfield from damage caused by construction traffic.
Adding plumbing when a pole barn becomes living space
Converting storage or workshop space into a barndominium is a separate approval decision, even when water and sewer lines already reach the building. Review the proposed occupancy and wastewater load before adding the kitchen, laundry or finished bathroom layout.
For a 2026 conversion, repeat these checks:
- Update the use description. State that the proposal includes finished living space rather than describing it only as a barn bathroom.
- Recheck both systems. Ask whether the approved septic design and well supply support the revised use. Existing connections are not evidence of approval for a dwelling.
- Coordinate finished construction. Resolve plumbing vents, service access, insulation, electrical requirements and interior layouts with the relevant trades before closing walls.
Ayres Construction & Remodeling’s barndominium scope runs from site preparation through finished interiors, not shell-only construction. Ask the proposal to distinguish building work from septic design, well work and any specialist installation so responsibility stays clear.
Well-water treatment and service access
A well connection and a treatment system solve different problems. The connection delivers water; treatment must address the water-quality findings and intended use. Choose treatment after testing rather than assuming every private well needs the same equipment.
When connecting a whole-house water filter, account for service access and pressure loss in the supply layout. Have the plumbing professional place treatment equipment according to the selected equipment’s requirements, with access for maintenance and an appropriate bypass arrangement where specified.
Do not choose treatment solely by how much wall space is available. Confirm that the equipment addresses the identified issue and works with the expected flow and pressure. If treatment generates backwash or discharge, have its disposal route reviewed rather than assuming it belongs in the septic system.
Best for workshop owners: Keep maintenance equipment accessible without moving machinery or stored materials. An accessible layout helps technicians isolate a problem without disturbing the rest of the building.
Troubleshooting connection problems
The septic connection is close, but the drain cannot reach it by gravity
Stop before changing the floor height or burying the pipe. Have the plumber or designer verify elevations and evaluate an approved route or pumping arrangement. A deeper trench alone does not establish a workable downstream connection.
Water pressure drops when several fixtures run
Have the well and plumbing professionals check supply performance, pump controls, pressure equipment, pipe sizing and restrictions. Do not assume a larger pressure tank fixes a supply limitation. Identify whether the problem begins at the well, along the service line or within the building.
The proposed slab covers a cleanout or service point
Revise the layout before concrete placement and have the responsible professional confirm the new location. Preserve the access required by the approved design. Marking a concealed component on a drawing does not make it serviceable.
A workshop drain is shown connected to the septic system
Identify what will enter that drain before approving the connection. Oils, solvents, fuels and process wastewater need an appropriate disposal plan; a floor drain is not automatically suitable for a domestic septic system. Remove unapproved connections from the scope.
The existing septic system has incomplete records
Contact the responsible authority and arrange professional location and assessment. Do not treat missing paperwork as proof that no restrictions apply. Keep the new building footprint and excavation plan provisional until the system and protected areas are identified.
Customize your workflow
Turn the approved utility plan into a construction scope with clear inclusions and exclusions. Separate excavation, rock removal, unsuitable soil handling, septic alterations, well upgrades, treatment equipment, electrical work, testing, inspections and final grading. State which contractor supplies each item and who restores disturbed areas.
Ayres Construction & Remodeling is best for local owners coordinating pole-barn construction with site preparation. For septic and well connections, require the proposal to name the responsible trades and approval tasks rather than reading specialist work into a general construction description.
Before requesting an estimate, prepare a short package:
- The intended building use and fixture schedule.
- The site drawing and available septic and well records.
- The proposed building location and access route.
- Any planned future living space or additional fixtures.
- The items you expect included in the construction scope.
Ask for a project estimate tied to that scope. A clearly excluded item is easier to plan for than an unassigned task discovered after excavation begins.
FAQ
Can I connect a pole barn to my existing septic system?
You can connect a pole barn to an existing septic system only when the proposed use, system condition, capacity and local approvals support the connection. Have the system reviewed before installing a new building sewer.
Can a pole barn share the house’s well?
A pole barn can share a well when the supply, plumbing design and applicable requirements support the added demand. Check water quality separately from well performance and pressure.
Do I need approval for a pole-barn bathroom?
Confirm the required building, plumbing and septic approvals with the authorities responsible for your property before construction. An existing well or septic system does not automatically authorize additional fixtures.
Should I install plumbing before pouring the pole-barn slab?
Install and inspect the required under-slab plumbing before pouring concrete. Finalize fixture locations, drain elevations and service penetrations first.
Can I connect a workshop floor drain to septic?
Do not connect a workshop floor drain to septic without an approved design addressing its discharge. Oils, solvents and other non-domestic wastewater require a suitable disposal plan.
Does a barndominium need a separate septic system?
A barndominium does not automatically need a separate septic system. The approved use, required capacity, existing system condition and site constraints determine whether an existing connection is acceptable.
Does Ayres Construction & Remodeling build only barndominium shells?
Ayres Construction & Remodeling provides barndominium construction from site preparation through finished interiors. Have the proposal separately identify septic, well and specialist utility responsibilities.
One last thing
Record underground routes before backfilling. Keep approved as-built drawings and photographs showing pipe locations relative to permanent reference points. Include shutoffs, cleanouts and service crossings; those records help future contractors avoid guessing beneath the slab or driveway.