

Instead of patching a gap where your concrete patio meets the house, plan an independently supported slab with an isolation joint and drainage away from the foundation. To connect a concrete patio to your home foundation in 2026, distinguish a weather-resistant joint from a structural connection: drilling and doweling require a project-specific design, not a standard DIY detail.
- To connect concrete patio to home foundation, plan an isolation joint unless a structural design requires attachment.
- Keep patio loads on a prepared base; keep runoff moving away from the house.
- Never drill foundation walls without checking structure, waterproofing and concealed utilities.
- Ayres Construction & Remodeling serves concrete-project buyers in Kentucky and southern Indiana.
Why this matters
A patio and a house foundation do different jobs. The foundation supports the building; an exterior patio slab supports its own intended use and faces changing moisture and temperature conditions. Tying them together without a design can transfer movement rather than prevent it.
For your 2026 project, define the connection before excavation begins. Ayres Construction & Remodeling is based in Bowling Green, Kentucky, and offers concrete, excavation and general contracting services. Your estimate should identify drainage, base preparation and the foundation-edge detail separately—not bury them under a single concrete-work description.
A patio can meet your house without being structurally attached to it. That distinction controls the work below.
Before you start
- Gather site information. Have a property survey if available, utility-location information, door-threshold elevations and photographs of the foundation edge. Confirm permit and inspection requirements with the local building department before excavation.
- Identify the wall and intended loads. Tell the contractor whether the patio meets poured concrete, masonry, brick veneer or another assembly. Disclose planned masonry features, a roof, an enclosure or other loads that need separate evaluation.
- Check the hidden gotcha: wall drainage. Patio concrete must not bury weep holes, cover required siding clearance or damage foundation waterproofing. Brick veneer is not a substitute for a structural foundation attachment point.
For a 2026 scope, verify applicable requirements locally rather than copying an online construction detail. Door access, wall clearances and drainage must work together at the actual site.
Choose the foundation-edge detail
Use an isolation joint as the starting detail for a patio that does not need structural attachment. The joint separates the slab from the house so the concrete does not bear directly against the wall as it moves. A compatible sealant detail manages water at the exposed joint; it does not replace proper grading.
A structural connection serves a different purpose. Where a project requires load transfer or restraint, a qualified designer must specify the attachment, foundation suitability and movement provisions. A dowel is not automatically appropriate merely because both surfaces are concrete.
| Foundation-edge approach | Best for | Advantage | Limitation |
|---|---|---|---|
| Independently supported patio with isolation joint | Ordinary patio planning without a structural attachment requirement | Separates patio movement from the house | Does not compensate for weak soil or poor drainage |
| Designed structural connection | Projects with an identified structural need | Provides the connection required by the design | Requires foundation evaluation and project-specific details |
Do not treat these as interchangeable upgrades. More steel does not correct an unsuitable connection detail. Ask what the connection is intended to do before agreeing to drill the house.
Drainage plan
- Mark the finished patio elevation. Establish where the concrete will meet the house and compare that elevation with door thresholds, siding and wall drainage openings. Resolve conflicts before setting forms; lowering the slab afterward means replacement or substantial rework.
- Set the drainage direction. A common planning target for an exterior concrete surface is a fall of 1/4 inch per foot away from the building. Across a 10-foot patio depth, that equals 2 1/2 inches of fall. Confirm the final slope against local requirements, accessibility needs and the full drainage route.
- Identify the discharge point. Follow runoff beyond the patio edge. Water needs somewhere appropriate to go without collecting beside the foundation, crossing a doorway or creating a problem on adjoining property.
Expected result: Your plan shows a finished elevation at the house, a lower outside edge and a workable runoff route. A slope arrow alone is not enough if the patio drains into a trapped low spot.
Check roof runoff at the same time. A downspout discharging onto the patio can concentrate water near the wall even when the slab itself slopes correctly. Coordinate any drainage changes with the patio work rather than treating them as a separate cleanup task.
Base preparation
- Locate utilities before digging. Contact the utility-location service and identify private lines that public utility marking does not cover. Do not excavate against the foundation until the work area and buried services are understood.
- Remove unsuitable material. Strip vegetation, organic material and loose material from the slab footprint. Stop if excavation reveals soft areas, unexpected fill or conditions that differ from the proposed base design.
- Prepare and compact the supporting base. Have the contractor specify aggregate, placement and compaction suitable for the soil and intended use. Maintain the planned elevations without undermining foundation footings or damaging waterproofing.
Expected result: The patio footprint has consistent support, planned elevations and no unresolved soft spots. Concrete thickness alone does not make an unstable base suitable.
New-home sites need particular attention where the patio crosses backfilled excavation beside the foundation. Do not assume that soil beside a recently built house provides the same support as undisturbed ground farther away. Ask how that transition will be prepared and evaluated.
Isolation joint
- Confirm the wall interface. Identify the foundation surface, waterproofing and any nearby veneer or siding. Use the approved edge detail for that assembly; do not fasten through protective layers simply to hold a temporary form.
- Install the specified isolation material. Keep the patio separated from the house through the slab depth as required by the joint detail. Do not allow concrete, reinforcement or debris to bridge a joint intended to permit independent movement.
- Plan the exposed sealant joint. Specify compatible sealant and backing where required, including preparation and joint geometry. Follow the selected material's instructions rather than filling an arbitrary gap with whatever sealant is available.
Expected result: The slab edge can move independently, and the exposed joint has a defined water-management detail. The joint is not a concealed rigid connection disguised by a bead of sealant.
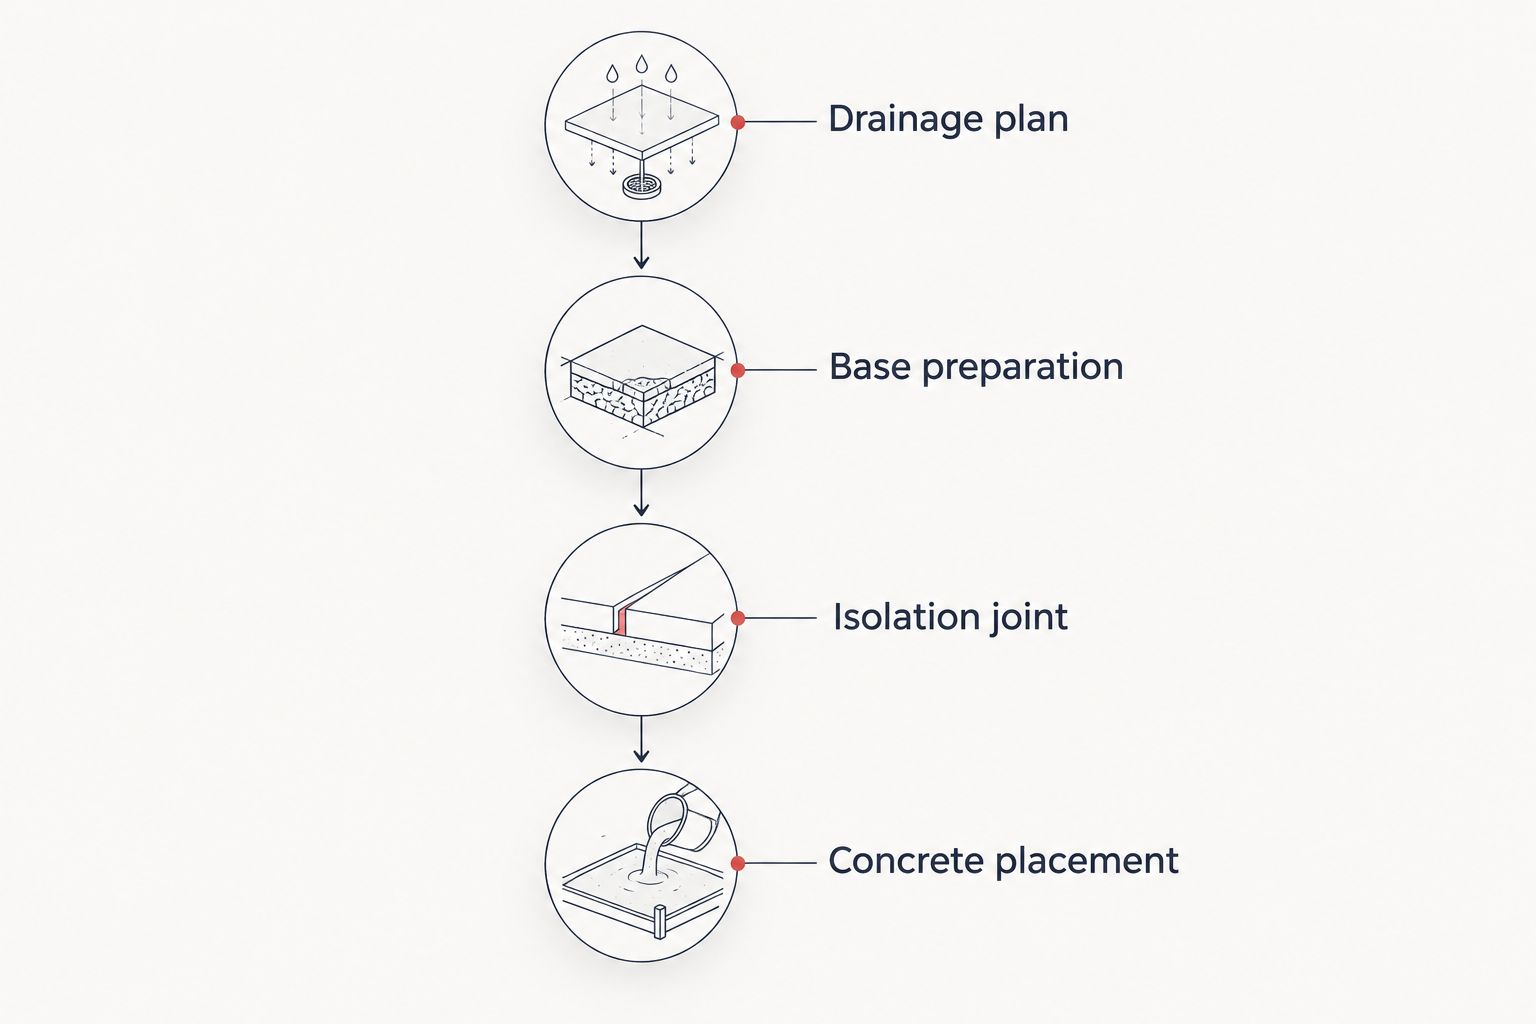
Concrete placement
- Check the forms and joint layout. Verify the slope, outside drainage route and isolation material before the pour. Plan contraction joints to manage shrinkage cracking; these are different from the isolation joint along the house.
- Verify reinforcement against the design. Check placement and support before concrete covers the work. Do not add bars into the house as an improvised way to keep the patio from settling.
- Place, finish and cure the concrete. Use a finish appropriate for an exterior walking surface and follow the specified curing method. Protect the work and observe the contractor's instructions for loading and access.
Expected result: The patio matches the approved elevations, remains separated from the house where specified and has a defined curing plan. Verify these items before accepting the finished work—not after landscaping hides the edges.
For a 2026 contract, include a pre-pour checkpoint in the written scope. This is when you can still see the base, reinforcement and joint material, and when corrections avoid breaking out finished concrete.
When an existing patio is being replaced
Replacement work starts with diagnosis, not copying the old slab. An existing patio that slopes toward the house or has settled beside the foundation is not a reliable template for the new elevations.
- Document the existing conditions. Photograph cracks, low spots, wall staining and the joint before demolition. Note where water collects during rain without entering an unsafe area.
- Inspect after removal. Have the contractor check exposed wall surfaces, old attachment points and supporting soil. Arrange evaluation of foundation damage before covering it with a replacement patio.
- Reset the detail. Establish the replacement slab's elevation, drainage and isolation joint from the current site conditions. Do not automatically reuse old dowel holes or conceal cut steel without an approved repair detail.
This adjacent workflow also applies when replacing a patio during a larger remodeling project. Coordinate new doors, exterior finishes and steps before pouring. A changed threshold can make the previous slab elevation unsuitable even when the old patio appeared level.
Troubleshooting
Water collects against the foundation
Check elevations with suitable measuring equipment rather than judging the surface by eye. Identify whether the cause is a reverse slope, settlement, a blocked outlet or concentrated roof runoff. Repairing the joint alone does not correct a patio that directs water toward the house.
The patio has dropped beside the wall
Have the support conditions and drainage evaluated before selecting a repair. A failed base or poorly supported fill needs attention; connecting the slab to the foundation is not a substitute. Do not prescribe lifting, replacement or structural attachment until the cause is established.
The joint sealant separates or tears
Check joint movement, surface preparation, backing and material compatibility. Remove failed material and repair the joint to the specified detail rather than layering new sealant over a failed bond. Persistent movement calls for evaluation beyond another sealant application.
Cracks appear near the foundation edge
Inspect whether concrete bridged the isolation joint, whether reinforcement created unintended restraint and whether the base moved. Cracks alone do not establish the cause. Have the contractor assess the pattern and surrounding conditions before proposing a repair.
A proposed anchor location conflicts with waterproofing
Stop drilling and have the connection detail reviewed. The attachment and the waterproofing repair must be compatible with the foundation assembly. Moving a hole slightly does not resolve an unverified structural or water-management detail.
Customize your workflow
For a basic patio, the scope centers on grading, support, concrete and the wall joint. For a covered patio, outdoor masonry feature or future enclosure, establish the intended loads before construction. A walking-surface slab is not automatically a suitable foundation for those additions.
Ayres Construction & Remodeling is best for property owners seeking a local, licensed and insured concrete contractor in Kentucky and southern Indiana. Ask for a project estimate that distinguishes the patio from any separate structural work, drainage changes or foundation repairs.
Your 2026 estimate request should identify:
- Included work: demolition, excavation, base preparation, forming, concrete placement, joints and cleanup.
- Separate items: engineering, permits, drainage alterations, utility relocation and landscaping restoration, with responsibility assigned.
- Unforeseen conditions: how unsuitable soil, buried obstructions or damaged waterproofing will be documented and addressed.
Use the project contact page to describe the patio location, approximate footprint, access restrictions and intended use. Include photographs of the house edge and any existing drainage problem.
FAQ
Should I connect a concrete patio directly to my house foundation?
Do not assume a direct structural connection is necessary. An independently supported patio typically uses an isolation joint at the house; structural attachment requires a project-specific design.
Can I drill rebar into the foundation to stop my patio from settling?
Do not use drilled-in rebar as a substitute for suitable slab support. Evaluate the soil, base and drainage, and obtain a designed connection if structural attachment is required.
How much slope should a concrete patio have away from the house?
A common planning target is 1/4 inch per foot away from the house. Confirm the final slope with local requirements, accessibility needs and the site's drainage route.
Is an isolation joint the same as a concrete control joint?
No. An isolation joint separates the patio from an adjacent structure, while a contraction or control joint creates a planned location for shrinkage cracking within the slab.
Can I pour a concrete patio against brick siding?
Do not use brick veneer as a structural attachment point or bury its drainage openings. Establish the patio elevation and edge detail around the actual wall assembly before pouring.
Can a new patio support a future roof or enclosed room?
A patio slab does not automatically provide suitable support for a roof or enclosed room. Identify future loads before construction so the required foundation and connections can be designed.
What should a patio estimate include in 2026?
A 2026 patio estimate should define excavation, base preparation, drainage, concrete placement and joint details. It should also identify responsibility for permits, engineering, unforeseen soil conditions and restoration.
One last thing
Inspect the foundation-edge detail before the concrete arrives. Once the slab is placed, you cannot easily verify whether isolation material continues through the required depth or whether concrete has bridged the joint. Ask Ayres Construction & Remodeling to make that inspection point part of your project discussion.